目录
SkiaSharp 提供了丰富的画笔样式设置选项,通过 SKPaint 类可以控制绘制线条的各种属性。本文将详细介绍线宽(StrokeWidth)、线帽(StrokeCap)和线段连接(StrokeJoin)的使用方法。
Nuget 安装包
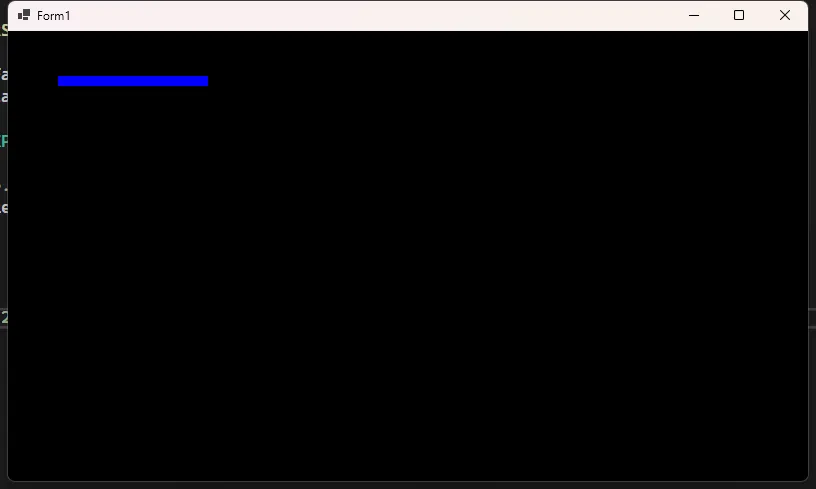
线宽 (StrokeWidth)
线宽决定了绘制线条的粗细,通过设置 SKPaint.StrokeWidth 属性来控制。
C#public partial class Form1 : Form
{
    SKGLControl skControl;
    public Form1()
    {
        InitializeComponent();

        skControl = new SKGLControl();
        skControl.Dock = DockStyle.Fill;
        skControl.PaintSurface += SkControl_PaintSurface;

        this.Controls.Add(skControl);
        this.BackColor = System.Drawing.Color.Black;
    }

    private void SkControl_PaintSurface(object sender, SKPaintGLSurfaceEventArgs e)
    {
        SKCanvas canvas = e.Surface.Canvas;
        canvas.Clear(SKColors.Black);
        // 创建画笔对象
        using var paint = new SKPaint
        {
            Style = SKPaintStyle.Stroke,    // 设置为描边模式
            Color = SKColors.Blue,          // 设置颜色
            StrokeWidth = 10                // 设置线宽为10像素
        };

        // 使用画笔绘制一条直线
        canvas.DrawLine(50, 50, 200, 50, paint);
    }

}
线帽 (StrokeCap)
线帽定义了线条端点的样式,SkiaSharp 提供了三种基本的线帽样式:
SKStrokeCap.Butt: 平直的端点SKStrokeCap.Round: 圆形端点SKStrokeCap.Square: 方形端点
C#public void DrawLineWithDifferentCaps(SKCanvas canvas)
{
    // 基础画笔设置
    using var paint = new SKPaint
    {
        Style = SKPaintStyle.Stroke,
        Color = SKColors.Blue,
        StrokeWidth = 20
    };

    // 绘制参考线
    using var thinPaint = new SKPaint
    {
        Style = SKPaintStyle.Stroke,
        Color = SKColors.Gray,
        StrokeWidth = 1
    };

    // 绘制三种不同的线帽样式
    float y = 50;
    foreach (SKStrokeCap cap in Enum.GetValues(typeof(SKStrokeCap)))
    {
        // 绘制参考线
        canvas.DrawLine(50, y, 250, y, thinPaint);

        // 设置线帽样式
        paint.StrokeCap = cap;

        // 绘制主线条
        canvas.DrawLine(50, y, 250, y, paint);

        // 添加文字说明
        using var textPaint = new SKPaint
        {
            Color = SKColors.Black,
            TextSize = 16
        };
        canvas.DrawText(cap.ToString(), 260, y + 5, textPaint);

        y += 50; // 下一行的位置
    }
}

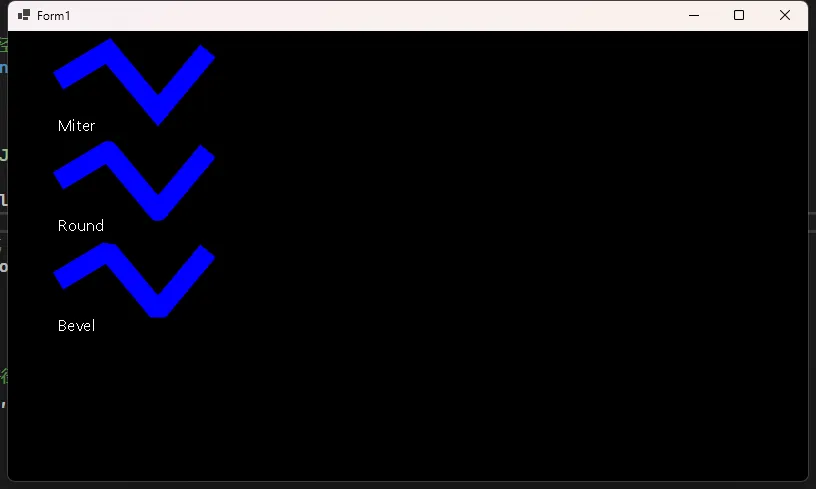
线段连接 (StrokeJoin)
线段连接定义了两条线段相交时的连接样式,SkiaSharp 提供了三种连接样式:
SKStrokeJoin.Miter: 尖角连接SKStrokeJoin.Round: 圆角连接SKStrokeJoin.Bevel: 斜角连接
C#public void DrawPathWithDifferentJoins(SKCanvas canvas)
{
    // 创建基础画笔
    using var paint = new SKPaint
    {
        Style = SKPaintStyle.Stroke,
        Color = SKColors.Blue,
        StrokeWidth = 20
    };

    // 创建一个之字形路径
    using var path = new SKPath();

    float x = 50;
    float y = 50;
    foreach (SKStrokeJoin join in Enum.GetValues(typeof(SKStrokeJoin)))
    {
        // 设置连接样式
        paint.StrokeJoin = join;

        // 重置路径
        path.Reset();

        // 创建之字形路径
        path.MoveTo(x, y);
        path.LineTo(x + 50, y - 30);
        path.LineTo(x + 100, y + 30);
        path.LineTo(x + 150, y - 30);

        // 绘制路径
        canvas.DrawPath(path, paint);

        // 添加文字说明
        using var textPaint = new SKPaint
        {
            Color = SKColors.Black,
            TextSize = 16
        };
        canvas.DrawText(join.ToString(), x, y + 50, textPaint);

        y += 100; // 下一组的位置
    }
}
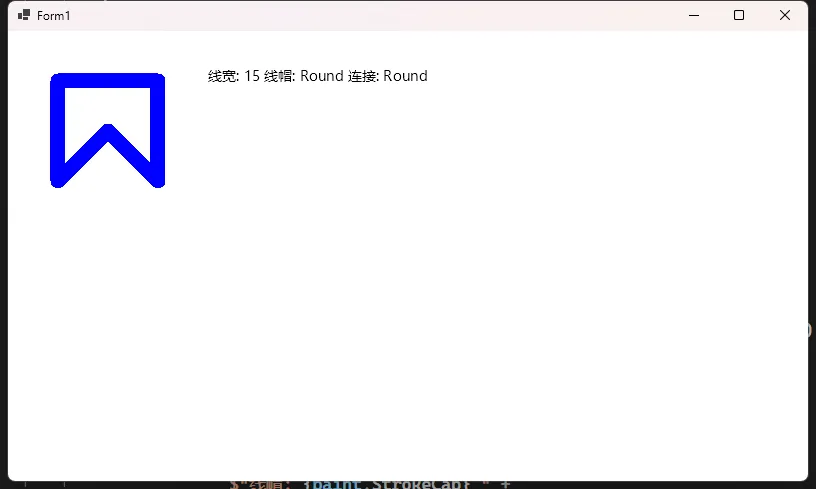
综合示例
下面是一个综合运用线宽、线帽和线段连接的完整示例:
C#using SkiaSharp;
using SkiaSharp.Views.Desktop;

namespace AppBrushStyle
{
    public partial class Form1 : Form
    {
        SKGLControl skControl;
        public Form1()
        {
            InitializeComponent();

            skControl = new SKGLControl();
            skControl.Dock = DockStyle.Fill;
            skControl.PaintSurface += SkControl_PaintSurface;

            this.Controls.Add(skControl);
            this.BackColor = System.Drawing.Color.Black;
        }

        private void SkControl_PaintSurface(object sender, SKPaintGLSurfaceEventArgs e)
        {
            SKCanvas canvas = e.Surface.Canvas;
            canvas.Clear(SKColors.Black);
            DrawComplexShape(canvas);
        }

        public void DrawComplexShape(SKCanvas canvas)
        {
            // 清空画布
            canvas.Clear(SKColors.White);

            // 创建画笔
            using var paint = new SKPaint
            {
                Style = SKPaintStyle.Stroke,
                Color = SKColors.Blue,
                StrokeWidth = 15,
                StrokeCap = SKStrokeCap.Round,    // 圆形线帽
                StrokeJoin = SKStrokeJoin.Round   // 圆角连接
            };

            // 创建一个复杂路径
            using var path = new SKPath();
            path.MoveTo(50, 50);
            path.LineTo(150, 50);
            path.LineTo(150, 150);
            path.LineTo(100, 100);
            path.LineTo(50, 150);
            path.Close(); // 闭合路径

            // 绘制路径
            canvas.DrawPath(path, paint);

            // 创建字体和文本画笔
            using var font = new SKFont(SKTypeface.FromFamilyName("Microsoft YaHei"), 14);
            using var textPaint = new SKPaint
            {
                Color = SKColors.Black
            };

            string info = $"线宽: {paint.StrokeWidth} " +
                         $"线帽: {paint.StrokeCap} " +
                         $"连接: {paint.StrokeJoin} ";

            canvas.DrawText(info, 200, 50, font, textPaint);
        }
    }
}
注意事项
- 线宽(StrokeWidth)设置为0时,SkiaSharp会使用最细的可能线宽(通常是1像素)。
- 使用
SKStrokeJoin.Miter时,可以通过SKPaint.StrokeMiter属性设置最大斜接长度,默认值为4。当超过这个值时,会自动转换为Bevel样式。 - 线帽样式会影响线条的实际长度:
Butt: 线条长度等于指定长度Round和Square: 线条在两端各延伸半个线宽的距离
- 在处理复杂路径时,合理选择线段连接样式可以提高视觉效果:
Miter: 适合需要尖角的图形,如矩形Round: 适合需要平滑过渡的图形Bevel: 适合需要平直切角的图形
性能考虑
Round类型的线帽和连接样式需要额外的计算,在绘制大量图形时可能影响性能。- 较大的线宽会增加渲染负担,特别是在绘制复杂路径时。
- 如果不需要特殊的线帽和连接效果,使用默认值(
Butt和Miter)可以获得最好的性能。
总结
SkiaSharp 的画笔样式设置提供了灵活的线条绘制选项,通过合理组合线宽、线帽和线段连接,可以创建出各种视觉效果。在实际应用中,需要根据具体需求和性能要求选择合适的样式设置。
本文作者:技术老小子
本文链接:
版权声明:本博客所有文章除特别声明外,均采用 BY-NC-SA 许可协议。转载请注明出处!
目录