
目录
在现代信息系统中,串口通信依然有其不可替代的地位,尤其是在工业自动化、物联网以及嵌入式系统等领域。C#语言提供的 SerialPort 类(位于 System.IO.Ports 命名空间中)大大简化了串口编程的实现过程,使开发者能够轻松实现数据的读写操作。本篇文章旨在深入解析 C# 中 SerialPort 类的各个核心属性与方法,详细讨论串口打开、关闭以及参数配置过程中可能遇到的问题,并着重展示在 WinForms 环境下如何优雅地处理数据接收、UI 更新以及异常情况。
在实际项目中,经常会遇到使用串口通信时的阻塞与死锁问题。例如,在调用 serialPort.Close() 时如果存在尚未处理完的数据或者 UI 更新操作,可能导致整个程序假死。合理的异常处理机制以及线程安全的多线程设计显得尤为重要。
SerialPort类详解
SerialPort类的基本属性与构造函数
SerialPort 类支持多种构造函数,其中较为完整的版本如下:
C#public SerialPort(
    string portName,
    int baudRate,
    Parity parity,
    int dataBits,
    StopBits stopBits
)
使用该构造函数,开发者可以直接传入串口名称、波特率、奇偶校验、数据位和停止位,例如:
C#SerialPort serialPort = new SerialPort("COM1", 9600, Parity.None, 8, StopBits.One);
该代码片段展示了如何将串口设置为 COM1、波特率 9600、无奇偶校验、数据位 8 和停止位 1。
主要属性说明
SerialPort 对象包含如下主要属性:
- PortName:指定串口名称,例如 "COM1"、"COM3" 等。
- BaudRate:波特率是数据传输的速度,常用的值有 9600、115200 等。
- Parity:奇偶校验,用于检测数据错误,常见取值有 Parity.None、Parity.Even、Parity.Odd 等。
- DataBits:每个数据帧的位数,通常是 8 位。
- StopBits:停止位数量,用于标识每个数据帧的结束,常用 StopBits.One。
- Handshake:定义数据传输中是否需要流控制,常用值为 Handshake.None。
- ReadTimeout 与 WriteTimeout:设置读取和写入操作的超时时间,可以防止在缓冲区无数据时长期阻塞操作。
下面的表格对这些常用属性进行了详细说明:
| 属性名称 | 描述 | 常用取值 |
|---|---|---|
| PortName | 串口号,如 "COM1"、"COM2" | 具体的系统端口号 |
| BaudRate | 数据传输速率 | 9600、115200 等 |
| Parity | 奇偶校验检查 | None、Even、Odd |
| DataBits | 每个数据帧的位数 | 8 |
| StopBits | 数据帧结束标志 | One、Two |
| Handshake | 数据传输时的流控制措施 | None、XOnXOff、RequestToSend |
| ReadTimeout | 读取数据的超时时间 | 毫秒数,如500 |
| WriteTimeout | 写入数据的超时时间 | 毫秒数,如500 |
| CtsHolding | true表示对方设备已准备好接收数据 | true,false,需要硬件CTS引脚支持 |
| CDHolding | true表示检测到载波信号,通常意味着远程设备已连接 | true,false,需要硬件CD引脚支持 |
串口事件:数据接收与 UI 更新
在串口通信过程中,数据接收是一个需要特别关注的环节。SerialPort 类通过 DataReceived 事件支持异步数据的自动接收。订阅该事件时,通常需要编写对应的事件处理函数,并考虑线程安全问题。例如,在 WinForms 应用中,如果在后台线程中直接更新 UI 控件,容易引发线程冲突,从而导致程序死锁。
为了解决这一问题,开发人员通常会使用 Invoke 或 BeginInvoke 方法,将后台线程传来的数据交由主线程安全执行 UI 更新。需要注意的是,Invoke 会等待委托执行完毕,而 BeginInvoke 则是异步调用,因此在涉及串口关闭、线程阻塞等场景下,建议采用 BeginInvoke 来避免死锁现象。
示例代码如下:
C#public delegate void UpdateUIDelegate(byte[] data);

private void Comm_DataReceived(object sender, SerialDataReceivedEventArgs e)
{
    byte[] receivedData = new byte[8];
    try {
        serialPort.Read(receivedData, 0, 6);
        System.Threading.Thread.Sleep(100);
        // 使用 BeginInvoke 进行UI更新,避免阻塞关闭操作
        this.BeginInvoke(new UpdateUIDelegate(UpdateUI), receivedData);
    }
    catch (TimeoutException ex) {
        MessageBox.Show("超时:" + ex.Message);
    }
}

private void UpdateUI(byte[] data)
{
    string receivedStr = System.Text.Encoding.Default.GetString(data);
    // 更新UI控件,例如TextBox,显示接收到的数据
    this.textBoxData.Text = receivedStr;
}
上述代码展示了在数据接收事件中,如何使用 BeginInvoke 来进行异步 UI 更新,从而避免在关闭串口时由于阻塞导致的死锁问题。
串口的打开、关闭与参数配置
打开串口
打开串口是初始化串口通信的第一步。调用 Open() 方法之前,必须确保所有参数已经正确配置。例如:
C#try {
    serialPort.Open();
}
catch (UnauthorizedAccessException ex) {
    // 当串口被其他程序占用或权限不足时,抛出此异常
    MessageBox.Show("权限不足或串口正在使用:" + ex.Message);
}
catch (IOException ex) {
    // 串口不存在或其他I/O错误时处理该异常
    MessageBox.Show("I/O错误:" + ex.Message);
}
在调用 Open() 后,建议检测 serialPort.IsOpen 属性以确认串口成功打开。确保在异常捕获中给予用户明确的提示,便于及时排查问题。
关闭串口与安全退出
在完成数据通信后,需要调用 Close() 方法关闭串口,以释放系统资源。需要注意的是,如果在关闭串口前,其他线程正在进行数据接收或 UI 更新,可能会引发死锁。例如,若使用 Invoke 进行 UI 更新,而此时正等待数据接收中的线程结束,则会导致整个应用无响应。
为避免上述问题,可以在关闭串口前进行如下操作:
- 设置标志变量,表示正在准备关闭串口
- 检查是否有线程正在操作串口并等待处理完成
- 在所有操作完成后,再执行
Close()操作
下面的代码片段展示了如何安全关闭串口:
C#private bool isReceiving = false;
private bool isTryingToClose = false;

public void SafeCloseSerialPort()
{
    // 设置关闭标志
    isTryingToClose = true;
    // 等待数据接收线程全部退出
    while (isReceiving)
    {
        System.Windows.Forms.Application.DoEvents();
    }
    serialPort.Close();
}
上述方法确保了在关闭串口前,所有正在执行的数据处理线程均已结束,从而避免了因多线程冲突引起的死锁问题。
参数配置的重要性
正确设置串口参数对于确保通信稳定性至关重要。以下代码展示了如何配置串口参数:
C#SerialPort serialPort = new SerialPort();
serialPort.PortName = "COM5";
serialPort.BaudRate = 115200;
serialPort.Parity = Parity.None;
serialPort.DataBits = 8;
serialPort.StopBits = StopBits.One;
serialPort.Handshake = Handshake.None;

// 设置超时
serialPort.ReadTimeout = 500;
serialPort.WriteTimeout = 500;
在参数配置中,除了基本的端口、波特率、数据位、停止位、奇偶校验外,还需根据实际需求设置流控制(Handshake)和超时参数,以便在数据传输过程中出现异常时能及时中断并反馈错误。
常见异常处理策略
在串口通信过程中,可能会遭遇各种异常,下面介绍几种常见异常及其处理方法。
端口占用与权限问题
当串口被其他程序占用或权限不足时,调用 Open() 方法会触发 UnauthorizedAccessException 或 IOException。对此,应在 try-catch 块中进行捕获,并给出清晰的错误提示。例如:
C#try {
    serialPort.Open();
}
catch (UnauthorizedAccessException ex) {
    MessageBox.Show("串口访问权限不足:" + ex.Message);
}
catch (IOException ex) {
    MessageBox.Show("串口可能不存在或被占用:" + ex.Message);
}
这种异常处理方式能够有效防止因为串口被占用而导致整个应用异常退出,同时帮助开发者及时获取到问题根源.
超时异常处理
在读取数据过程中,如果数据未能在设定时间内到达,会触发 TimeoutException。为了防止线程长时间阻塞,可以设置 ReadTimeout 参数,同时在捕获异常后给出相应的提示:
C#try {
    byte[] buffer = new byte[serialPort.BytesToRead];
    int bytesRead = serialPort.Read(buffer, 0, buffer.Length);
}
catch (TimeoutException ex) {
    MessageBox.Show("数据读取超时:" + ex.Message);
}
这种处理方式不仅能够防止读取操作长时间卡顿,还能使得程序在发生异常时及时响应,避免整个应用陷入不响应状态。
未打开串口的操作
对于尝试在串口未打开时进行数据读写的操作,会引发 InvalidOperationException。在执行操作前,建议先检查 serialPort.IsOpen 属性,或者在 catch 块中捕获该异常:
C#if (!serialPort.IsOpen)
{
    MessageBox.Show("串口尚未打开,请先调用 Open() 方法。");
    return;
}
这种预防机制能够确保只有在串口处于打开状态时才进行数据传输,从而避免不必要的系统异常。
CtsHolding与CDHolding支持
全功能串口线(9针):
- 支持所有控制信号(CTS、CD、DSR、DTR、RTS等)
- 通常用于工业设备或专业通信
简化串口线(3线):
- 只支持TXD、RXD、GND
- 不支持CTS、CD等控制信号
- 这些信号值可能始终为false
**USB转串口适配器最好单独测试,**要看芯片,一般来说FTDI问题不大。
C#public static bool IsHardwareFlowControlSupported(SerialPort port)
{
    try
    {
        bool originalRts = port.RtsEnable;
        bool originalDtr = port.DtrEnable;

        // 测试RTS/CTS
        port.RtsEnable = false;
        Thread.Sleep(10);
        bool ctsLow = port.CtsHolding;

        port.RtsEnable = true;
        Thread.Sleep(10);
        bool ctsHigh = port.CtsHolding;

        port.RtsEnable = originalRts;
        port.DtrEnable = originalDtr;

        // 如果CTS随RTS变化,说明支持硬件流控
        return ctsLow != ctsHigh;
    }
    catch
    {
        return false;
    }
}
多线程下的线程安全问题
在 WinForms 应用中,后台线程进行串口数据接收后直接更新 UI 控件,容易引起跨线程调用异常。解决方法是使用 BeginInvoke(异步)或 Invoke(同步)方法将 UI 更新操作交由主线程执行,避免直接从事件处理线程中修改 UI 控件。
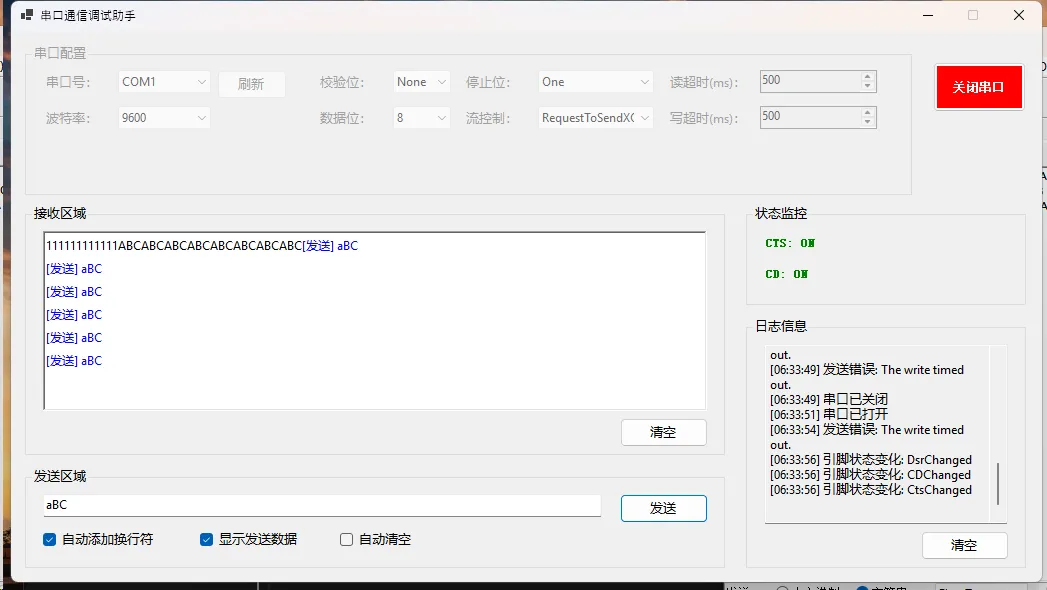
WinForms环境下串口通信的实现示例
示例代码
C#using System.IO.Ports;
using Timer = System.Windows.Forms.Timer;

namespace AppSerialPortExplained
{
    public partial class Form1 : Form
    {
        private SerialPort serialPort = new SerialPort();
        private Timer statusTimer = new Timer();
        public Form1()
        {
            InitializeComponent();
            RefreshPortList();

            comboBoxBaud.Items.AddRange(new object[] { "1200", "2400", "4800", "9600", "19200", "38400", "57600", "115200" });
            comboBoxBaud.SelectedIndex = 3;
            comboBoxParity.Items.AddRange(new object[] { "None", "Even", "Odd", "Mark", "Space" });
            comboBoxParity.SelectedIndex = 0;
            comboBoxDataBits.Items.AddRange(new object[] { "5", "6", "7", "8" });
            comboBoxDataBits.SelectedIndex = 3;
            comboBoxStopBits.Items.AddRange(new object[] { "One", "Two", "OnePointFive" });
            comboBoxStopBits.SelectedIndex = 0;
            comboBoxHandshake.Items.AddRange(new object[] { "None", "XOnXOff", "RequestToSend", "RequestToSendXOnXOff" });
            comboBoxHandshake.SelectedIndex = 0;
            numericUpDownReadTimeout.Value = 500;
            numericUpDownWriteTimeout.Value = 500;
            serialPort.DataReceived += SerialPort_DataReceived;
            serialPort.ErrorReceived += SerialPort_ErrorReceived;
            serialPort.PinChanged += SerialPort_PinChanged;
            InitializeTimer();
        }

        private void InitializeTimer()
        {
            statusTimer.Interval = 100;
            statusTimer.Tick += StatusTimer_Tick;
        }

        private void RefreshPortList()
        {
            string selectedPort = comboBoxPort.Text;
            comboBoxPort.Items.Clear();
            comboBoxPort.Items.AddRange(SerialPort.GetPortNames());

            if (comboBoxPort.Items.Count > 0)
            {
                if (comboBoxPort.Items.Contains(selectedPort))
                    comboBoxPort.Text = selectedPort;
                else
                    comboBoxPort.SelectedIndex = 0;
            }
        }

        private void buttonRefresh_Click(object sender, EventArgs e)
        {
            RefreshPortList();
        }

        private void buttonOpen_Click(object sender, EventArgs e)
        {
            if (!serialPort.IsOpen)
            {
                try
                {
                    serialPort.PortName = comboBoxPort.Text;
                    serialPort.BaudRate = int.Parse(comboBoxBaud.Text);
                    switch (comboBoxParity.Text)
                    {
                        case "None": serialPort.Parity = Parity.None; break;
                        case "Even": serialPort.Parity = Parity.Even; break;
                        case "Odd": serialPort.Parity = Parity.Odd; break;
                        case "Mark": serialPort.Parity = Parity.Mark; break;
                        case "Space": serialPort.Parity = Parity.Space; break;
                    }

                    serialPort.DataBits = int.Parse(comboBoxDataBits.Text);

                    switch (comboBoxStopBits.Text)
                    {
                        case "One": serialPort.StopBits = StopBits.One; break;
                        case "Two": serialPort.StopBits = StopBits.Two; break;
                        case "OnePointFive": serialPort.StopBits = StopBits.OnePointFive; break;
                    }

                    switch (comboBoxHandshake.Text)
                    {
                        case "None": serialPort.Handshake = Handshake.None; break;
                        case "XOnXOff": serialPort.Handshake = Handshake.XOnXOff; break;
                        case "RequestToSend": serialPort.Handshake = Handshake.RequestToSend; break;
                        case "RequestToSendXOnXOff": serialPort.Handshake = Handshake.RequestToSendXOnXOff; break;
                    }

                    serialPort.ReadTimeout = (int)numericUpDownReadTimeout.Value;
                    serialPort.WriteTimeout = (int)numericUpDownWriteTimeout.Value;

                    serialPort.Open();

                    buttonOpen.Text = "关闭串口";
                    buttonOpen.BackColor = Color.Red;
                    groupBoxConfig.Enabled = false;
                    groupBoxSend.Enabled = true;

                    statusTimer.Start();

                    AppendLog("串口已打开");
                }
                catch (Exception ex)
                {
                    MessageBox.Show("打开串口失败: " + ex.Message, "错误", MessageBoxButtons.OK, MessageBoxIcon.Error);
                }
            }
            else
            {
                try
                {
                    serialPort.Close();

                    // 更新UI状态
                    buttonOpen.Text = "打开串口";
                    buttonOpen.BackColor = Color.Green;
                    groupBoxConfig.Enabled = true;
                    groupBoxSend.Enabled = false;

                    // 停止状态监控
                    statusTimer.Stop();

                    // 清空状态显示
                    labelCtsStatus.Text = "CTS: -";
                    labelCdStatus.Text = "CD: -";
                    labelCtsStatus.ForeColor = Color.Gray;
                    labelCdStatus.ForeColor = Color.Gray;

                    AppendLog("串口已关闭");
                }
                catch (Exception ex)
                {
                    MessageBox.Show("关闭串口失败: " + ex.Message, "错误", MessageBoxButtons.OK, MessageBoxIcon.Error);
                }
            }
        }

        private void buttonSend_Click(object sender, EventArgs e)
        {
            if (serialPort.IsOpen && !string.IsNullOrEmpty(textBoxSend.Text))
            {
                try
                {
                    string dataToSend = textBoxSend.Text;

                    // 根据发送模式添加结束符
                    if (checkBoxNewLine.Checked)
                        dataToSend += "\r\n";

                    serialPort.Write(dataToSend);

                    // 显示发送的数据
                    if (checkBoxShowSent.Checked)
                    {
                        AppendReceiveData($"[发送] {dataToSend}", Color.Blue);
                    }

                    // 清空发送框(如果选中了自动清空)
                    if (checkBoxAutoClear.Checked)
                        textBoxSend.Clear();
                }
                catch (Exception ex)
                {
                    MessageBox.Show("发送失败: " + ex.Message, "错误", MessageBoxButtons.OK, MessageBoxIcon.Error);
                    AppendLog($"发送错误: {ex.Message}");
                }
            }
        }

        private void buttonClearReceive_Click(object sender, EventArgs e)
        {
            textBoxReceive.Clear();
        }

        private void buttonClearLog_Click(object sender, EventArgs e)
        {
            textBoxLog.Clear();
        }

        private void SerialPort_DataReceived(object sender, SerialDataReceivedEventArgs e)
        {
            try
            {
                string received = serialPort.ReadExisting();
                AppendReceiveData(received, Color.Black);
            }
            catch (Exception ex)
            {
                AppendLog($"接收数据错误: {ex.Message}");
            }
        }

        private void SerialPort_ErrorReceived(object sender, SerialErrorReceivedEventArgs e)
        {
            AppendLog($"串口错误: {e.EventType}");
        }

        private void SerialPort_PinChanged(object sender, SerialPinChangedEventArgs e)
        {
            AppendLog($"引脚状态变化: {e.EventType}");
        }

        private void StatusTimer_Tick(object sender, EventArgs e)
        {
            if (serialPort.IsOpen)
            {
                try
                {
                    // 更新CTS状态
                    bool ctsHolding = serialPort.CtsHolding;
                    labelCtsStatus.Text = $"CTS: {(ctsHolding ? "ON" : "OFF")}";
                    labelCtsStatus.ForeColor = ctsHolding ? Color.Green : Color.Red;

                    // 更新CD状态
                    bool cdHolding = serialPort.CDHolding;
                    labelCdStatus.Text = $"CD: {(cdHolding ? "ON" : "OFF")}";
                    labelCdStatus.ForeColor = cdHolding ? Color.Green : Color.Red;
                }
                catch (Exception ex)
                {
                    AppendLog($"状态监控错误: {ex.Message}");
                }
            }
        }

        private void AppendReceiveData(string data, Color color)
        {
            if (textBoxReceive.InvokeRequired)
            {
                textBoxReceive.Invoke(new Action(() => AppendReceiveData(data, color)));
            }
            else
            {
                textBoxReceive.SelectionStart = textBoxReceive.TextLength;
                textBoxReceive.SelectionLength = 0;
                textBoxReceive.SelectionColor = color;
                textBoxReceive.AppendText(data);
                textBoxReceive.ScrollToCaret();
            }
        }

        private void AppendLog(string message)
        {
            if (textBoxLog.InvokeRequired)
            {
                textBoxLog.Invoke(new Action(() => AppendLog(message)));
            }
            else
            {
                string logEntry = $"[{DateTime.Now:HH:mm:ss}] {message}\r\n";
                textBoxLog.AppendText(logEntry);
                textBoxLog.ScrollToCaret();
            }
        }

        private void Form1_FormClosing(object sender, FormClosingEventArgs e)
        {
            if (serialPort.IsOpen)
                serialPort.Close();

            statusTimer.Stop();
            statusTimer.Dispose();
        }

        private void textBoxSend_KeyPress(object sender, KeyPressEventArgs e)
        {
            if (e.KeyChar == (char)Keys.Enter)
            {
                buttonSend_Click(sender, e);
                e.Handled = true;
            }
        }
    }
}
常见问题与解决方案
在实际开发过程中,使用 SerialPort 类时会遇到许多常见问题,下面列举并详细介绍解决方案:
死锁问题与 UI 更新阻塞
在调用 serialPort.Close() 时,如果数据接收线程仍在运行,采用 Invoke 调用 UI 更新方法会导致同步等待,最终引起死锁问题。解决这一问题的方法是改为使用 BeginInvoke 进行异步调用,以避免线程阻塞。
串口线程安全性问题
在多线程环境下,数据接收线程与 UI 主线程可能同时访问共享资源,若不加保护,容易引起数据竞争问题。通常的解决办法是采用标志控制(如 isReceiving 和 isTryingToClose)以及使用 Application.DoEvents() 循环确保所有后台线程结束后再关闭串口。
异常捕获不足
许多开发者在编写串口通信代码时,往往忽略了对各种异常(超时、I/O错误、未打开串口等)的充分捕获。应在关键操作(如 Open、Read、Write)处使用 try-catch 结构,将异常信息反馈给用户,并记录日志以便后续分析。
串口数据粘包或格式不正确
在数据连续传输的场景中,串口可能会因为数据粘包的问题导致解析错误。为解决这一问题,建议在数据传输协议中明确数据边界,如采用特定的分隔符,或者在数据头部增加包长度信息,然后在接收时进行数据拆包解析。
总结
通过对 C# SerialPort 类的详细解析,本文章展示了如何在 WinForms 环境下正确设置串口参数、打开关闭串口以及处理常见的异常情况。合理的异常捕获、线程安全机制以及 UI 数据更新策略,不仅提高了应用的稳定性,也为编写高质量串口通信程序提供了有效的技术支持。面对未来不断变化的硬件通信需求,开发者应继续关注异常自愈和智能数据解析技术的进步,为行业应用提供更全面、可靠的解决方案。
相关信息
通过网盘分享的文件:AppSerialPortExplained.zip 链接: https://pan.baidu.com/s/1VAXhOGiH2w0HR2h2u58g0w?pwd=sw2r 提取码: sw2r --来自百度网盘超级会员v9的分享
本文作者:技术老小子
本文链接:
版权声明:本博客所有文章除特别声明外,均采用 BY-NC-SA 许可协议。转载请注明出处!