目录
简介
轮廓检测是计算机视觉中的一项基本技术,用于识别图像中物体的边界。在OpenCvSharp中,我们可以使用多种方法来实现轮廓检测。本文将详细介绍如何使用OpenCvSharp进行轮廓检测,并提供多个实际示例。
基本概念
在OpenCvSharp中,轮廓是由图像中连续的点(边界点)组成的曲线,代表物体的形状。轮廓检测通常在二值图像上进行,因此在检测之前,我们通常需要对图像进行预处理。
轮廓检测的基本步骤
- 图像预处理(灰度化、二值化)
- 边缘检测
- 轮廓查找
- 轮廓分析和绘制
让我们通过代码示例来详细了解每个步骤。
代码示例
1. 基本轮廓检测
C#using OpenCvSharp;
using System;
using System.Linq;
class Program
{
static void Main()
{
// 读取图像
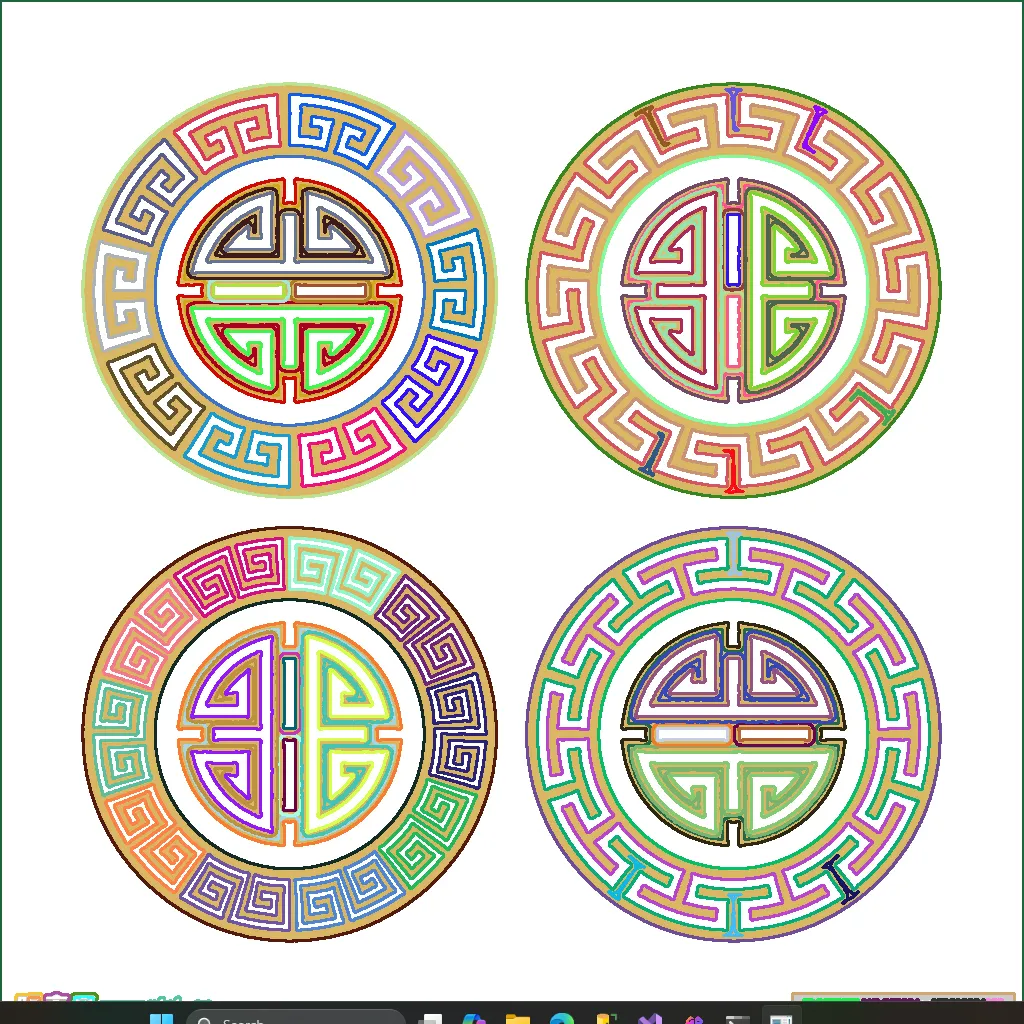
using var src = new Mat("1.jpg", ImreadModes.Color);
using var gray = new Mat();
using var binary = new Mat();
// 转换为灰度图像
Cv2.CvtColor(src, gray, ColorConversionCodes.BGR2GRAY);
// 应用高斯模糊以减少噪声
Cv2.GaussianBlur(gray, gray, new Size(5, 5), 0);
// 使用自适应阈值进行二值化
Cv2.AdaptiveThreshold(gray, binary, 255, AdaptiveThresholdTypes.GaussianC, ThresholdTypes.Binary, 11, 2);
// 查找轮廓
Point[][] contours;
HierarchyIndex[] hierarchy;
Cv2.FindContours(binary, out contours, out hierarchy, RetrievalModes.Tree, ContourApproximationModes.ApproxSimple);
// 创建src的副本用于绘制轮廓
using var result = src.Clone();
// 绘制轮廓
for (int i = 0; i < contours.Length; i++)
{
// 只绘制面积大于某个阈值的轮廓
if (Cv2.ContourArea(contours[i]) > 100)
{
Cv2.DrawContours(result, contours, i, Scalar.RandomColor(), 2);
}
}
// 显示结果
Cv2.ImShow("Contours", result);
Cv2.WaitKey(0);
}
}
Cv2.AdaptiveThreshold 方法的签名如下:
C#void Cv2.AdaptiveThreshold(InputArray src, OutputArray dst, double maxValue, AdaptiveThresholdTypes adaptiveMethod, ThresholdTypes thresholdType, int blockSize, double C)
参数说明:
src: 输入图像,应为单通道8位图像。dst: 输出图像,与输入图像大小和类型相同。maxValue: 当像素值超过阈值时赋予的值(常用255表示白色)。adaptiveMethod: 自适应阈值计算方法,有两种选择:AdaptiveThresholdTypes.MeanC: 阈值是邻域面积的平均值减去常数C。AdaptiveThresholdTypes.GaussianC: 阈值是邻域的高斯加权和减去常数C。
thresholdType: 阈值类型,通常使用ThresholdTypes.Binary。blockSize: 用于计算阈值的邻域大小,必须是奇数(如3、5、7等)。C: 从平均值或加权和中减去的常数。
工作原理:
- 对于图像中的每个像素,函数计算其周围 blockSize × blockSize 邻域的阈值。
- 根据 adaptiveMethod,计算这个邻域的平均值或高斯加权和。
- 从计算结果中减去常数 C,得到该像素的阈值。
- 如果像素值大于计算出的阈值,则设为 maxValue,否则设为0。
使用示例:
C#Cv2.AdaptiveThreshold(gray, binary, 255, AdaptiveThresholdTypes.GaussianC, ThresholdTypes.Binary, 11, 2);
这个调用使用高斯方法,blockSize 为 11x11,C 值为 2。
AdaptiveThreshold 的优势:
- 可以处理光照不均匀的图像。
- 对于同一图像的不同区域可以使用不同的阈值。
- 通常能产生比全局阈值更好的结果,特别是对于有背景照明变化的图像。
调整建议:
- 增大 blockSize 会使阈值对局部图像变化less敏感。
- 增大 C 值会降低阈值,可能会检测到更多细节。
通过调整这些参数,您可以找到最适合您特定图像的设置。
这个例子展示了基本的轮廓检测过程。我们首先将图像转换为灰度,然后进行二值化。接着使用Cv2.FindContours方法查找轮廓,最后绘制检测到的轮廓。
2. 轮廓面积和周长计算
C#using OpenCvSharp;
using System;
using System.Linq;

class Program
{
    static void Main()
    {
        // 读取图像
        using var src = new Mat("1.jpg", ImreadModes.Color);
        using var gray = new Mat();
        using var binary = new Mat();

        // 转换为灰度图像
        Cv2.CvtColor(src, gray, ColorConversionCodes.BGR2GRAY);

        // 应用高斯模糊以减少噪声
        Cv2.GaussianBlur(gray, gray, new Size(5, 5), 0);

        // 使用自适应阈值进行二值化
        Cv2.AdaptiveThreshold(gray, binary, 255, AdaptiveThresholdTypes.GaussianC, ThresholdTypes.Binary, 11, 2);

        // 查找轮廓
        Point[][] contours;
        HierarchyIndex[] hierarchy;
        Cv2.FindContours(binary, out contours, out hierarchy, RetrievalModes.Tree, ContourApproximationModes.ApproxSimple);

        // 创建src的副本用于绘制轮廓
        using var result = src.Clone();

        // 遍历每个轮廓
        int contourIndex = 0;
        foreach (var contour in contours)
        {
            double area = Cv2.ContourArea(contour);
            double perimeter = Cv2.ArcLength(contour, true);

            Console.WriteLine($"Contour {contourIndex}: Area: {area:F2}, Perimeter: {perimeter:F2}");

            // 只绘制面积大于某个阈值的轮廓
            if (area > 100)
            {
                Cv2.DrawContours(result, new[] { contour }, 0, Scalar.RandomColor(), 2);

                // 计算轮廓的重心
                var M = Cv2.Moments(contour);
                int cX = (int)(M.M10 / M.M00);
                int cY = (int)(M.M01 / M.M00);

                // 在图像上标记轮廓编号
                Cv2.PutText(result, contourIndex.ToString(), new Point(cX, cY), HersheyFonts.HersheySimplex, 0.5, Scalar.White, 2);
            }

            contourIndex++;
        }

        // 显示结果
        Cv2.ImShow("Contours", result);
        Cv2.WaitKey(0);

        // 保存结果
        result.SaveImage("result.jpg");
    }
}
 这个示例展示了如何计算每个轮廓的面积和周长。这对于过滤小的噪声轮廓或识别特定大小的物体非常有用。
3. 轮廓近似
C#for (int i = 0; i < contours.Length; i++)
{
    double epsilon = 0.02 * Cv2.ArcLength(contours[i], true);
    Point[] approx = Cv2.ApproxPolyDP(contours[i], epsilon, true);
    Cv2.DrawContours(drawing, new[] { approx }, 0, Scalar.RandomColor(), 2);
}
C#using OpenCvSharp;
using System;

class Program
{
    static void Main()
    {
        // 读取图像
        using var src = new Mat("1.jpg", ImreadModes.Color);
        using var gray = new Mat();
        using var binary = new Mat();

        // 转换为灰度图像
        Cv2.CvtColor(src, gray, ColorConversionCodes.BGR2GRAY);

        // 应用高斯模糊以减少噪声
        Cv2.GaussianBlur(gray, gray, new Size(5, 5), 0);

        // 使用Canny边缘检测
        Cv2.Canny(gray, binary, 50, 150);

        // 查找轮廓
        Point[][] contours;
        HierarchyIndex[] hierarchy;
        Cv2.FindContours(binary, out contours, out hierarchy, RetrievalModes.Tree, ContourApproximationModes.ApproxSimple);

        // 创建一个与原图大小相同的黑色图像用于绘制
        using var drawing = new Mat(src.Size(), MatType.CV_8UC3, Scalar.Black);

        // 对每个轮廓进行多边形近似并绘制
        for (int i = 0; i < contours.Length; i++)
        {
            double epsilon = 0.02 * Cv2.ArcLength(contours[i], true);
            Point[] approx = Cv2.ApproxPolyDP(contours[i], epsilon, true);

            // 绘制近似后的轮廓
            Cv2.DrawContours(drawing, new[] { approx }, 0, Scalar.RandomColor(), 2);

            // 计算并显示轮廓的顶点数
            Console.WriteLine($"Contour {i}: {approx.Length} vertices");

            // 在图像上标记轮廓的顶点数
            var M = Cv2.Moments(approx);
            int cX = (int)(M.M10 / M.M00);
            int cY = (int)(M.M01 / M.M00);
            Cv2.PutText(drawing, approx.Length.ToString(), new Point(cX, cY),
                        HersheyFonts.HersheySimplex, 0.5, Scalar.White, 2);
        }

        // 显示结果
        Cv2.ImShow("Approximated Contours", drawing);
        Cv2.WaitKey(0);

        // 保存结果
        drawing.SaveImage("approximated_contours.jpg");
    }
}
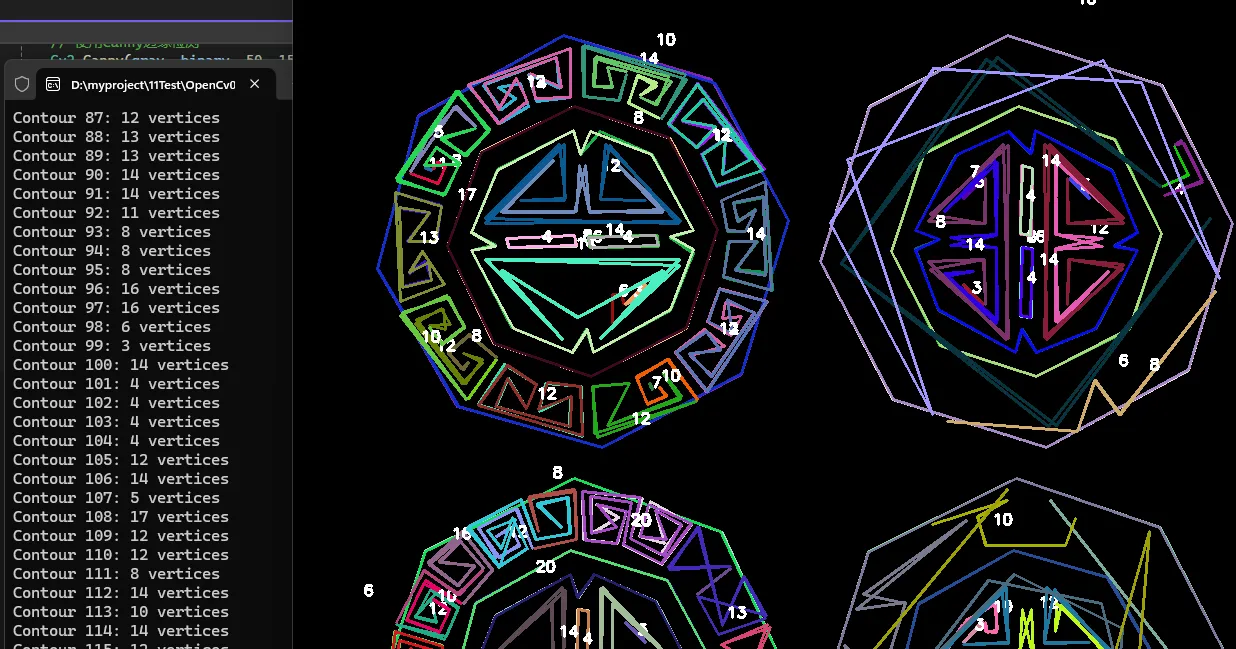
轮廓近似可以减少轮廓点的数量,同时保持整体形状。这在处理复杂形状或减少计算量时非常有用。
4. 凸包检测
C#for (int i = 0; i < contours.Length; i++)
{
    Point[] hull = Cv2.ConvexHull(contours[i]);
    Cv2.DrawContours(drawing, new[] { hull }, 0, Scalar.RandomColor(), 2);
}
C#using OpenCvSharp;
using System;

class Program
{
    static void Main()
    {
        // 读取图像
        using var src = new Mat("1.jpg", ImreadModes.Color);
        using var gray = new Mat();
        using var binary = new Mat();

        // 转换为灰度图像
        Cv2.CvtColor(src, gray, ColorConversionCodes.BGR2GRAY);

        // 应用高斯模糊以减少噪声
        Cv2.GaussianBlur(gray, gray, new Size(5, 5), 0);

        // 使用自适应阈值进行二值化
        Cv2.AdaptiveThreshold(gray, binary, 255, AdaptiveThresholdTypes.GaussianC, ThresholdTypes.Binary, 11, 2);

        // 查找轮廓
        Point[][] contours;
        HierarchyIndex[] hierarchy;
        Cv2.FindContours(binary, out contours, out hierarchy, RetrievalModes.Tree, ContourApproximationModes.ApproxSimple);

        // 创建一个与原图大小相同的黑色图像用于绘制
        using var drawing = new Mat(src.Size(), MatType.CV_8UC3, Scalar.Black);

        // 对每个轮廓计算凸包并绘制
        for (int i = 0; i < contours.Length; i++)
        {
            // 计算凸包
            Point[] hull = Cv2.ConvexHull(contours[i]);

            // 绘制凸包
            Cv2.DrawContours(drawing, new[] { hull }, 0, Scalar.RandomColor(), 2);

            // 计算原始轮廓和凸包的面积
            double contourArea = Cv2.ContourArea(contours[i]);
            double hullArea = Cv2.ContourArea(hull);

            // 计算凸度(Convexity)
            double convexity = contourArea / hullArea;

            Console.WriteLine($"Contour {i}: Convexity = {convexity:F2}");

            // 在图像上标记凸度
            var M = Cv2.Moments(hull);
            int cX = (int)(M.M10 / M.M00);
            int cY = (int)(M.M01 / M.M00);
            Cv2.PutText(drawing, $"{convexity:F2}", new Point(cX, cY),
                        HersheyFonts.HersheySimplex, 0.5, Scalar.White, 2);
        }

        // 显示结果
        Cv2.ImShow("Convex Hulls", drawing);
        Cv2.WaitKey(0);

        // 保存结果
        drawing.SaveImage("convex_hulls.jpg");
    }
}
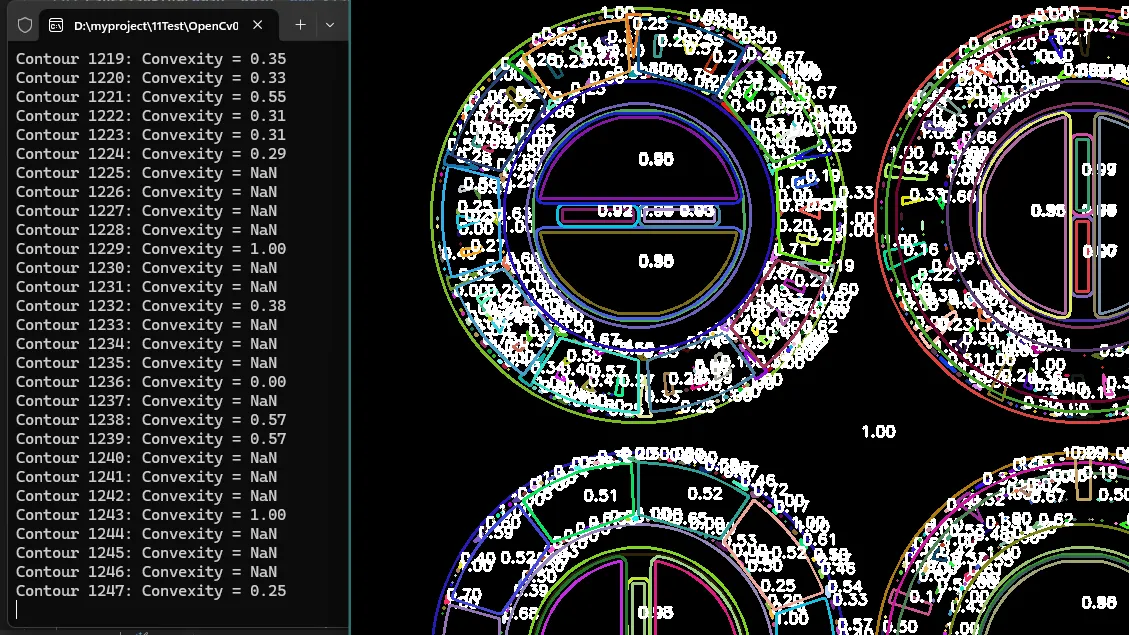
凸包是包围轮廓的最小凸多边形。它可以用于检测物体的大致形状或找出凹陷区域。
5. 轮廓矩和中心点
C#foreach (var contour in contours)
{
    Moments moments = Cv2.Moments(contour);
    Point center = new Point(moments.M10 / moments.M00, moments.M01 / moments.M00);
    Cv2.Circle(drawing, center, 5, Scalar.Red, -1);
}
计算轮廓的矩可以帮助我们找到轮廓的中心点,这对于物体跟踪和形状分析非常有用。
边界矩形和最小外接圆可以用来快速估计物体的大小和位置。
结论
OpenCvSharp提供了强大而灵活的轮廓检测功能。通过本文介绍的各种技术,你可以实现从基本的轮廓检测到复杂的形状分析等多种应用。在实际项目中,你可能需要根据具体需求组合使用这些技术,并进行适当的参数调整以获得最佳结果。
记住,轮廓检测的效果很大程度上依赖于输入图像的质量和预处理步骤。因此,在应用这些技术时,要特别注意图像的预处理,如去噪、边缘增强等操作。
本文作者:技术老小子
本文链接:
版权声明:本博客所有文章除特别声明外,均采用 BY-NC-SA 许可协议。转载请注明出处!